Smart Ways To Prepare Your Home For AC Installation And Replacement
Key Takeaways
- Prepping your home before AC installation saves time, reduces disruption, and ensures a smooth project.
- Selecting the right AC system is crucial—energy efficiency and correct sizing help avoid wasted money or discomfort.
- Proactive maintenance and responsible recycling of old units help you keep cool while supporting sustainability.
- Working closely with certified HVAC professionals ensures safety and long-term comfort for your home.
- Staying informed about air conditioning technology can enhance your decision-making and your home’s energy savings.
- Proper planning pays off: cleaner installs, better efficiency, and fewer headaches for homeowners.
Table of Contents
- Why AC Replacement Matters
- Choosing the Right System for Your Home
- Preparing Your Space for Installation
- What to Expect on Installation Day
- Ensuring Energy Efficiency
- Recycling and Responsible Disposal
- Ongoing Maintenance Tips
- Common Questions Answered
Why AC Replacement Matters
Most homeowners only consider replacing their air conditioning system when it stops working altogether, but the benefits of an upgrade often begin well before total failure. Aging AC units typically experience more frequent breakdowns, inconsistent cooling, and a steady decline in efficiency. According to data from the U.S. Department of Energy, air conditioning can account for over 12% of U.S. home energy expenditures, and inefficient systems can cause these costs to spike. Upgrading to a newer model can significantly reduce energy consumption, with some studies reporting savings between 20% and 40% for households that switch from outdated systems to modern ones.
Another critical reason to investigate air conditioning replacement before your unit fails is indoor air quality and comfort. Newer units often feature advancements in air filtration and humidity control, making them particularly beneficial for those with allergies, asthma, or sensitive respiratory systems. Suppose your current AC is over 10 years old. In that case, it is making strange noises and cannot maintain comfortable temperatures even after repairs. Investing in a replacement can provide peace of mind while lowering long-term expenses and hassles.
Choosing the Right System for Your Home
Choosing a new AC system can feel daunting due to the many available options. Modern air conditioners have various configurations for different home sizes, layouts, and climates. Central air systems, heat pumps, and ductless mini-split units each offer unique advantages and drawbacks. Deciding which system is right begins with accurately measuring your square footage and understanding insulation. Undersized or oversized systems can cause uneven temperatures and excessive cycling, reducing lifespan while increasing operational costs. Energy efficiency ratings, such as the SEER (Seasonal Energy Efficiency Ratio), have also become essential for evaluating system performance. The higher the SEER rating, the better the system converts electricity into cool air, saving you money during peak summer months. Turn to reputable experts for a comprehensive breakdown of models, features, and energy-saving technologies to look for. Consulting experienced HVAC professionals during this stage can help clarify questions about installation requirements and ongoing maintenance.
Preparing Your Space for Installation
Preparing your home for a new AC system does more than help the installation—ensuring a safe and efficient process is essential. Begin by identifying where your current units are, both inside and out. Remove furniture, potted plants, toys, or any stored items restricting access to the indoor air handler or outdoor condenser. A clear, obstacle-free workspace helps technicians avoid delays and accidental damage to their belongings. Check your electrical panel location and verify easy access to the thermostat area if upgrades or rewiring are planned.
- Clear the area around both indoor and outdoor units
- Secure pets and family members away from work zones
- Locate breaker panels and thermostat wiring in advance
- Make sure ductwork (if present) is accessible
- Protect valuables or electronics from potential dust
Proactively covering nearby surfaces and electronics can prevent dust from installation or removal work from spreading throughout your home. Additional planning to clear paths for equipment might be necessary in multi-story properties or homes with tight hallways. A little preparation helps the installation stay on schedule.
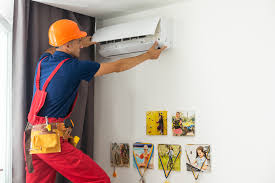
What to Expect on Installation Day
Installation day can be busy, but it is typically well-organized and efficient when properly prepared. Technicians will begin by safely disconnecting and decommissioning your old system, which involves responsibly handling refrigerants and carefully removing heavy equipment. The new AC unit is then placed in its designated spot, and all connections for power, refrigerant, and ductwork are made according to the manufacturer and local safety codes. In most cases, crews consist of two or more professionals, which allows the process to move quickly even in larger homes.
As work progresses, expect moderate noise and increased foot traffic as installers move equipment and tools in and out. If you have questions or concerns, reputable professionals will happily update you on their progress. After completion, thorough testing ensures all systems function as intended and that the installation meets local code and safety standards. Always ask the installers to demonstrate the system before leaving, and conveniently store all instruction manuals and warranty documents. Taking these steps helps you get comfortable with your new investment from day one.
Ensuring Energy Efficiency
An efficient installation doesn’t mean C is turned on for the first time; it is only the beginning if you hope to maximize your long-term savings. Start by choosing high-efficiency models featuring ENERGY STAR® certification, which have been shown to save up to 15% on cooling costs compared to standard models. Even the best unit will underperform if not installed or appropriately sized.
Additional steps, such as sealing ductwork, caulking drafty windows, and insulating attics, will prevent cool air from escaping your home, reducing energy demand. Upgrading to smart thermostats provides enhanced control over cooling schedules, letting you automate settings to fit your daily patterns. Additional things —like cleaning condenser coils and checking refrigerant level —can extend the system’s life, keeping it running at peak performance. These simple choices will help you get the most efficiency and comfort from your new AC.
Recycling and Responsible Disposal
Air conditioning units contain valuable metals, components, and refrigerant chemicals that require careful handling during disposal. Most municipalities prohibit throwing away entire AC units with household waste, as improper disposal releases harmful refrigerants and increases landfill waste. Fortunately, many HVAC contractors include removing and recycling your old unit as part of their service, ensuring that all hazardous materials are reclaimed and recycled according to EPA standards. Participating in responsible recycling keeps harmful substances out of the environment and allows valuable resources to be reused. To further understand why responsible disposal matters, review the guidance outlining the benefits of reclaiming refrigerants and safe material processing. If your installer does not offer recycling as part of their service, local waste management authorities often provide listings of approved facilities. By making the right choice, you protect the planet and may qualify for rebates or incentives in some states.
Ongoing Maintenance Tips
Owning a new air conditioning system is only an investment if you maintain it properly. The simplest and most impactful maintenance habit is to check your air filter every month during high-use seasons and change it as soon as it appears dirty. Clogged filters strain your system, degrading performance and causing energy costs to rise. Outdoor condenser coils should be inspected and cleaned at least once per season to ensure proper airflow; debris, tall grass, and leaves can restrict operation and cause overheating.
- Change filters every 1-2 months or as recommended by the manufacturer
- Schedule an annual inspection and tune-up by a professional
- Keep the outdoor condenser clear of debris, plants, and yard waste
- Listen for any new noises or reduced airflow, which may signal a problem
- Document professional visits and any repairs for warranty claims
Following these steps preserves indoor air quality, reduces long-term repair expenses, and helps your system run smoothly for years.
Common Questions Answered
Homeowners often wonder when they can safely start using a newly installed AC. Typically, a newly commissioned unit is ready for immediate operation; it’s set to follow any installer-specific recommendations, such as briefly waiting for lubricants to settle. Many professionals encourage homeowners to test all functions (cool, fan, settings) under guidance, ensuring a firm grasp of the controls. In terms of maintenance, plan for annual professional tune-ups, which often include cleaning coils, checking refrigerant, and making minor adjustments that can prevent early breakdowns.
Staying watchful for unusual noises, leaks, or reduced cooling helps you spot issues that are easy to fix. Another helpful tip is to keep a simple maintenance log to record service dates, filter changes, and any problems noticed. This habit streamlines communication with service providers and keeps warranty coverage intact. By taking a proactive approach to ownership, you’ll experience lasting comfort from your AC investment.
also read, Shipping Containers for Sale Nashville: A Friendly Guide